Learning how to edit videos is vital if you want your video to have impact. Whether you’re putting the finishing touches to your latest YouTube video, crafting a national social media ad for a key client or developing tutorial videos for your team – a well-edited video stands out from the crowd.
And realising your creative vision is easier than you think: you just need a straightforward video editing process to get you started.
Step 1. Choose your software
Editing videos requires planning and preparation. Usually, the format of your footage will influence the type of video editing software you should use.
If you shot your footage on your phone or tablet, for example, your device may already have a video editing tool you can use. Or, your computer might have a built-in video editing app, like iMovie for Mac.
But if you want more sophisticated editing capabilities, you want to look at advanced platforms like Adobe Premiere Pro. And when your video is ready for review, these tools integrate with Dropbox Replay so you can action feedback directly from Replay within your editor.
Dropbox is the ideal hub for your managing and storing your raw video files. Everything is all in one place and accessible across devices – you can take mobile videos and have them accessible on your computer when you’re ready to edit.
Import and organise your footage and audio
Proper planning of your assets and project files will help you to stay organised – and sane – as you progress through the editing process.
When editing on a computer, you can usually drag and drop your video, audio and image files from your folder system into your video editing software to import them. This will depend on the interface of your editing software and your computer’s operating system. Sometimes when going through the import process, you can set the aspect ratio you want to use for your video.
Once you’ve imported your media, you can drag your files into your project. Here, you’ll be able to see the video thumbnails and start to sift through your footage. Your software will display a workspace with multiple windows displaying the imported media, your editing preview and the video timeline.

Step 2. Experiment with your editing platform
Once you’ve assembled your footage and audio, it’s time to start building the pieces into a story.
Video editing requires joining clips together into a sequence, which are sometimes tied together with transitions. Basic free tools will provide a library of transitions you can choose from, whereas some more advanced software may allow you to create custom transitions.
The function and name given to video editing tools will depend on the software you are using. However, there are some common tools that you will see in most video editors.
Basic editing functions and tools
- Select – for selecting your footage before editing
- Trim – for cutting your footage
- Split – for splitting one clip into two or more separate clips
- Copy and paste – for copying and pasting a selected clip
- Undo – for undoing your last action
Advanced editing functions and tools
- Audio effects – for adding sound effects and background music, and altering the volume, background noise and other aspects of sound in your video
- Video effects – for colour correction and grading, inserting transitions and adding titles or text
Step 3. Image correction
Image correction is all about enhancing your video. There may be some faults in the footage you didn’t notice during filming. This may be due to the camera you used, or the lighting/environment where the footage was filmed. Alternatively, you might have been given an aesthetic or visual style that your video needs to stick to.
You can address all of these issues with image correction. Many video editors provide sliders that you can drag to the left to decrease or the right to increase the visual characteristics of your video. Typical image correction capabilities in video editing software include:
- Contrast
- Brightness
- Shadows
- Highlights
- Saturation
- Exposure
- White balance
- Vibrancy/warmth
- Sharpness
Finding the right balance between these features will be a case of trial and error. Ask any video editor – professional or amateur – and they’ll tell you how tricky it can be to achieve what you visualise in your mind on the screen.
But with a few tweaks here and there, you can take your video to the next level in just a few clicks. Some video editing software even offers an “automatic” image correction option to save you time – and often a lot of stress!

Step 4. Check the video consistency and continuity
Continuity is key to making your video believable and easy for the viewer to follow. This means ensuring the footage flows from frame to frame in a logical way. It also requires matching the colour of each frame so that the visual style of the video is consistent. This is particularly important if your video is a documentary or intended for marketing purposes.
Sometimes the footage we capture doesn’t allow us to build a video with a logical timeline during post-production. In this case, you can trim your clips and insert transitions between frames to act as cutaways. For an interview video, this could mean cutting to the interviewer so you can edit out long pauses or stutters in the interviewee’s response.
When you’re happy with your final video, share it with your colleagues or friends for feedback in Dropbox Replay. You might have overlooked or missed a small detail in the editing process that another pair of eyes will notice while previewing the whole video.

Step 5. Gather feedback and make amends
Giving precise feedback on time-based media like video is also a challenge for your reviewers. They’re likely to rewind your video over and over again to give the feedback you need. Then you’re reliant on them giving you the right timestamp for the feedback, rather than “after she walks through the grass, but before she looks up…”
If reviewers are reviewing your video separately, they’re likely to provide scattered feedback across emails, chats, calls, apps and documents. Piecing all of this back together can be incredibly time-consuming, and often creates duplicate work. It’s enough to give anyone a headache.
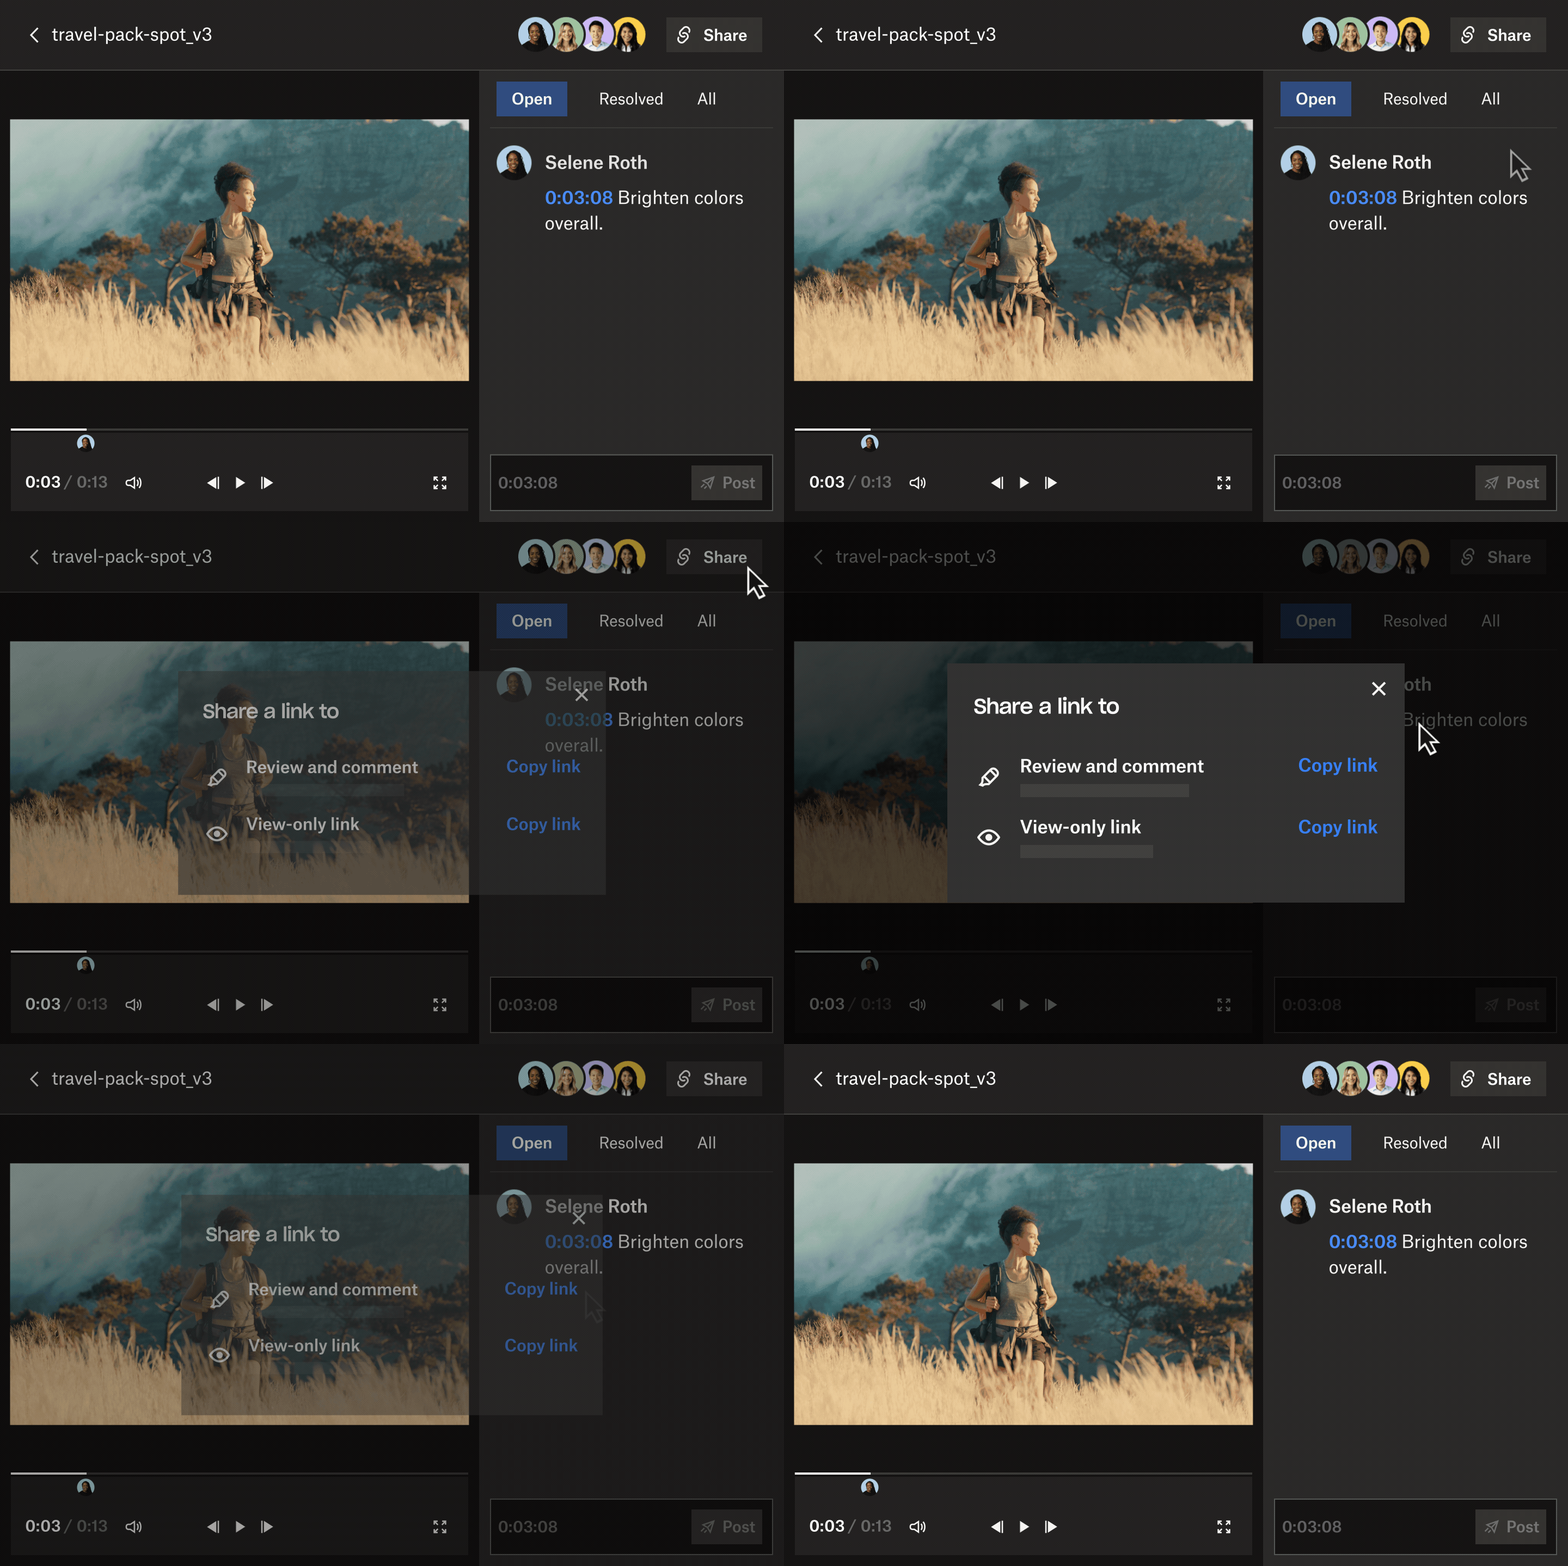
Dropbox Replay helps you fast-track the review process for video files right from your Dropbox account. Each reviewer can add frame-accurate annotations, markups and comments to videos, so you can get precise feedback that’s clear and actionable. The best part? All they need is a link to your video – no additional software required, or even a Dropbox account. Get feedback from anyone in record time, with minimal fuss.
Replay integrates with your favourite video editing software like Adobe Premiere Pro, Apple Final Cut Pro and Blackmagic Design DaVinci Resolve so you can view, act on and resolve feedback straight from your editor.
After making your changes, save time by directly uploading your video into Replay as a new version from within your editing tool. You can then do a side-by-side playback of two versions in Replay to reference changes or updates to your video.
Step 6: Export and share your video
Once your video is ready to go, export it from your editing software into a format that can be uploaded or downloaded for use. Or, if you’d like a second opinion, you can share your video with your peers for feedback.
You’ll then want to give your video a suitable name and choose where to export it. For many editing software like Adobe Premiere Pro, you can alter things like render quality, video resolution and frame rate in the Export Settings.
Make Dropbox the start and end of your video editing projects
Dropbox is already the ideal place for filmmakers to safely store, back up, review and share your video projects as you edit them. Every part of the process – from storyboarding to feedback and editing – is held in one centralised location, whenever or wherever you need access.
Stop wasting time downloading and re-uploading your files to different places – start and finish your video projects in Dropbox.
